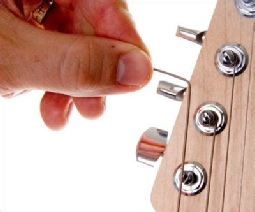


Electric guitar strings have a limited life span by design. Players who use a heavy grip on their fretting hand, use bends, sweat a lot, smoke or play in heavy smoke filled clubs, pick aggressively, and play continuously for long periods of time use that life span up rather quickly. Even if your guitar’s strings aren’t discolored with oxidation or haven’t been used much, there is a natural stretching that occurs over time which will dull the sound and make the instrument harder to tune. Periodic string changes are necessary to achieve and maintain a great sounding guitar.

How To String An Electric Guitar
When your electric guitar begins to sound flat, is hard to tune, will not stay in tune, or the strings begin to discolor with oxidation it is time to replace the guitar strings.
Tools Needed To String An Electric Guitar
How To Change Electric Guitar Strings
Guitar String Removal
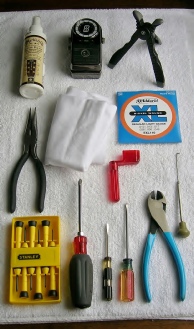
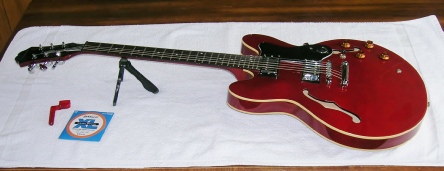
In order to change electric guitar strings there are a few simple tools that will be needed. The job will go a lot better if these things are gathered and laid out in advance. Obviously, a new set of strings is required (care should be taken to select the right string gauge) as well as a good quality electric guitar tuner, neck stand and string winder. You will also need a number one and number two tipped Phillips head screw drivers, a small blade screwdriver, a pair of wire cutting pliers, a small pair of needle nosed pliers, a small wire hook (which can easily be made from small gauge wire), a high quality guitar polish and an appropriate polish cloth. It is very helpful to gather and lay these things out in an organized manner. This allows you to access the tools as needed and minimizes the chance of damaging the guitar.
stuck in the bottom of your feet (if you happen to go barefoot), injure the family pet or get tangled in the vacuum cleaner. To prevent any of these unpleasant accidents, loosely wrap and dispose of used strings and excess string cuttings immediately after the restringing is completed. As each string is removed, check the tightness of the string tees and tuning pegs. It is also a good opportunity to clean and polish those hard to get to areas that the strings cover.
At this time, it should be noted that guitar strings should be removed and replaced ONE AT A TIME! Removing all the strings at once will drastically change the string pressure exerted on the neck. Eliminating all the string pressure completely and then immediately reapplying the pressure by restringing creates the potential to cause irreparable damage to the neck.
Disposal of the used guitar strings is
also important. The guitar strings and string cuttings that have been removed can easily get lost in the carpet, which will allow them to get
work bench. The proverbial kitchen table and a couple of clean bath towels work very well here. Simply lay out the bath towels (double thickness) to protect the finish of both the guitar and table, set up the neck stand and place the guitar on the towels. At this point, you are ready to begin.
Guitar String Replacement
The guitar should be held in a playing position, tuned and laid flat on a secure, padded, clean, flat surface. It is not necessary to purchase an expensive guitar
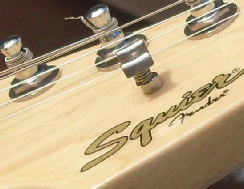
into the tuning peg. Using the string winder, tighten the string while pressing the string against the headstock to provide tension so the coils will be tightly wound. A word to the wise here, too much tension while winding will pull the guitar string out of the tuning peg and result in uneven coils. The goal is to apply just enough tension to eliminate the slack and allow the strings to ride in
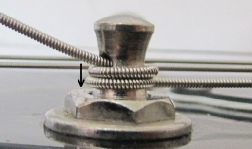
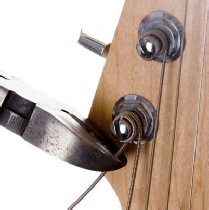

the groove of the underlying wound string, not coil over on top of the string. When this is completed, use the diagonal wire cutting pliers to cut off the excess string. Using an electric tuner, bring the new string up to the desired
pitch. At this point, stretch the new string by gently pulling it upward approximately one inch away from the neck a
few times. Repeat the process of tuning the guitar, then go to the next string and repeat the process until all of the guitar strings have been replaced.
Now that the strings have been replaced, it is time for the next step in the electric guitar setup process; Checking the Electric Guitar Nut.
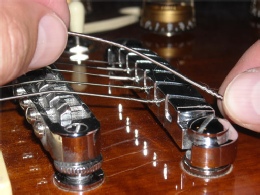
As stated previously in this article, it is imperative to remove and replace only one guitar string at a time! Slowly loosen the string that you are replacing and remove it from the tuning peg. To keep the string from damaging the finish around the headstock and bridge/string stop areas, it is sometimes necessary to cut the string at the tuning peg after it is loosened. This is necessary because the coiled end is stiff and will not pass through the bridge/string stop without scratching or gouging the finish. Remove the used string and lay it out straight and flat beside the new string so it can used to measure the length of the new string. If the old string needed to be cut to get it out, be sure to add that amount of length to the used string BEFORE you

compare the string lengths or the new string will be cut too short. If you don’t choose to use the replaced string for a length measurement, the length can be set after the string is threaded through the bridge and the nut. This is done by visually allowing approximately four tuning peg wraps before cutting off the excess guitar string length.
After the used guitar string is removed, check the tightness of the tuning peg, string tees and brackets while there is no stress on them. If the tuning peg needs to be tightened, care must be taken NOT to over tighten
the screws or nuts and strip the threads. Then thread the new string through the string stop, bridge and nut. If the new string is already cut to length, go to the end of the string and use a set of pliers to bend the string at a 90 degree angle, leaving about ¼ of an inch tail to insert into the tuning peg. If the new string has not been trimmed to length at this point, allow enough length for three or four wraps around the tuning peg and cut the excess string off before bending the cut end at a 90 degree angle and inserting it
